Most of us have that item that holds a lot emotional/sentimental value……for me it is my Grandparent’s old dining room table and chairs.
There were numerous family dinners, crafts, games and puzzles that at that table…..so many happy memories.
When they were ready to upgrade their dining room about 15 years ago, I was the first to ask if I could have the table and chairs. My uncle graciously offered to re-finish them since they had taken a beating over roughly 30 years.
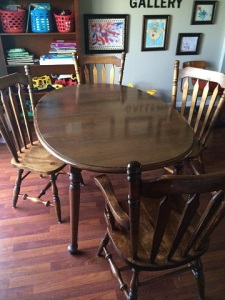
My beautiful outdated dining room furniture minus 2 leaves and 2 chairs………..
Well after 15 years of life with us it has again taken a beating.
My husband and I had a serious discussion about just getting something new since it was outdated. After some thought I decided I wasn’t ready to part ways with it just yet. Plus what is the point in getting something new when we have little ones. Like I said in a previous post, “we can’t have nice things”. That is the motto in our house……we say it at least once a day. Just yesterday my son stuffed a bunch of little toys into the printer and my husband said, “we can’t have nice things” so case in point.
I had a CRAZY idea after tooling around Pinterest and seeing a bunch of brightly colored furniture. I decided I was going to jazz it up…..really JAZZ it up!!
I headed to the home improvement store and picked up the brightest spray paint I could find.
My Project List:
- Paint Deglosser
- Valspar Spray Paint with Primer
- Small can of primer
- Rubber Gloves
- Sponge
- Mask (after spraying a few of the chairs without one I definitely recommend)
- Chalkboard Paint (I used the spray paint variety for this project)
- Preparation to be without a dining room table for at least a week (this was the hardest part)
I started by putting on the rubber gloves and spreading the deglosser on all of the wood with a sponge (read the directions if attempting). I ended up doing this twice. This roughs up the surface to get it ready for the paint.
After the glossy finish was roughed up a bit it was time to spray paint.
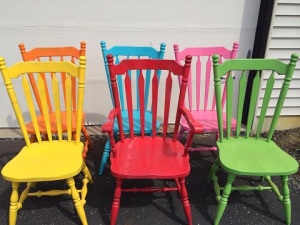
Below are my finished very BRIGHT and JAZZY chairs………
It took about 2 cans of spray paint per chair. It also took about a week before they were ready for sitting.
Next was the table……
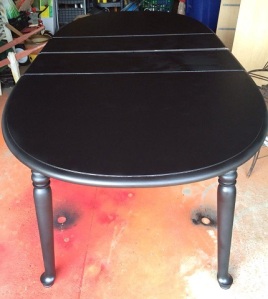
I spray painted the legs with black paint and covered the top of the table with a coat of primer. Then I put 3 coats of chalkboard paint on the top (I used spray chalkboard paint). Yes, I also spray painted my garage floor (my husband was not pleased) I think it makes it more interesting.
After letting the chalkboard paint set and harden up I chalked up the entire top and wiped it clean (not sure why this is needed but all of the chalkboard paint instructions recommend this).
Then I waited……and waited……and waited……..
Fast forward 1 week and several “picnic style” dinners on the floor……..
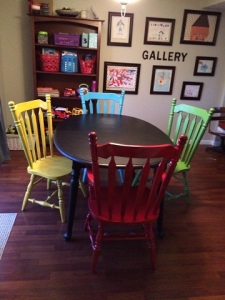
Brand new table!! The kids fought over who was getting the blue chair and my daughter won……my son opted for the green one. We even have a pink and orange one that we can switch in as we get bored with the colors.
Now for the BEST part…….
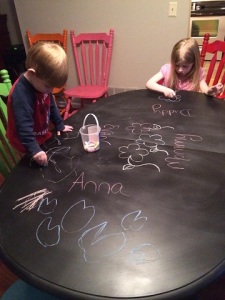
Oh Yeah!! The kids can write all over the table and not even get into trouble!! Besides just drawing we have used this to do homework (there was a lot of practicing numbers and letters this year in Kindergarten so this really came in handy).
Cleaning is a breeze too, just use soap and water like you would with anything else.
#1 most important thing about this project was letting the table sit until the paint sets (this was the most important and hardest thing to do). Just because it is hard to the touch does not mean it is set so if you do attempt to paint something like this please give it plenty of time to dry or you will have a scratched up mess on your hands.
In the end this was something that I was SUPER nervous to attempt but I am so happy that I did.
It has been about 4 months since I completed this project and we still love it.
This is my absolute favorite project!!! I can’t wait to try it myself!
LikeLike
SUPER excited to see it!!!!!
LikeLike